
My Sensei colleagues and I have written several articles about the Resource Engagements feature that Microsoft introduced almost two years ago in Project Online. I think it’s time for another blog post on this subject.
I personally love how the Resource Engagements feature opens a formal negotiation process between a project manager and a resource manager for the use of named resources in a project. However, creating the actual Resource Engagements for a named resource can be a bit of a challenge. For example, Figure 1 shows a project in which I need to create one or more Resource Engagements for the resource named Mickey Cobb.

Figure 1: Resource Engagements Needed for Mickey Cobb
According to company policy, Mickey Cobb cannot be used as a resource in any project without the explicit permission of her resource manager. In Figure 1 shown previously, the orange indicators in the Indicators column reveal the tasks to which she is currently assigned. In this project, I need to answer the following questions before I attempt to create any Resource Engagements for Mickey Cobb:
I think you can see that creating one or more Resource Engagements for Mickey Cobb requires a bit of analysis. For this article, let’s assume that I want to create three Resource Engagements for her with the correct Units for each time period.
Figure 2 shows the Resource Plan view for the project shown previously in Figure 1. I am ready to create the three Resource Engagements for Mickey Cobb. However, for what time periods do I need to create those Resource Engagements? I need those dates for the Proposed Start and Proposed Finish column. What is the Units value for her assigned tasks in each time period? I need this information for the Proposed Max Units column. And what type of work will she do during each time period? I need this information so that I can provide a description of the work in the Description field for each Resource Engagement. Do you see how the Resource Plan view offers no answers to these questions?
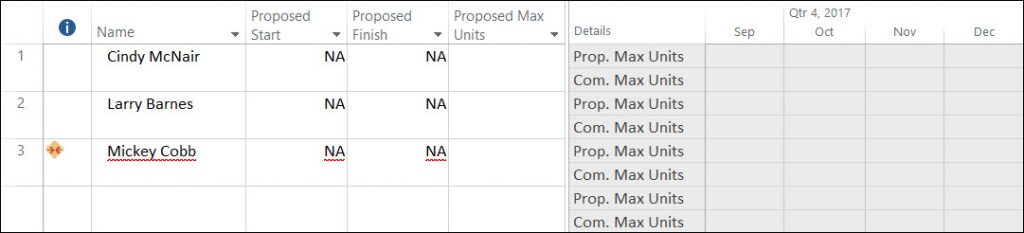
Figure 2: Resource Plan view
When the Resource Engagement feature was originally released for Project Online, I wrongly assumed that I could create a combination view (aka “split” view) that would include the Resource Plan view in the top pane, along with a view such as the Gantt Chart view in the bottom pane. A combination view such as this would make it easy to answer the questions I asked in the previous paragraph. Unfortunately, the error message shown in Figure 3 is what you will see if you attempt to use the Resource Plan view as part of any combination view.
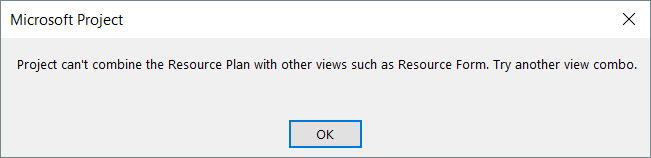
Figure 3: Error dialog
Because of this limitation, I had been resorting to “flipping back and forth” between the Resource Plan view and the Gantt Chart view to create Resource Engagements. However, during a training class in which I was teaching Resource Managers how to use Project Online, I had a stroke of inspiration. I figured out how to work around the restriction that does not allow us to use the Resource Plan view as part of a combination view.
Instead of trying to create a custom combination view containing the Resource Plan view, which is forbidden, I figured out that I could use a custom screen layout instead. Following are the steps needed to create this custom screen layout:
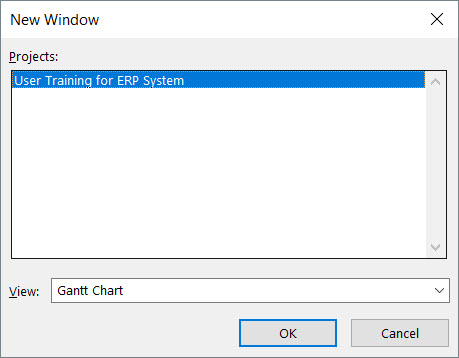
Figure 4: New Window dialog
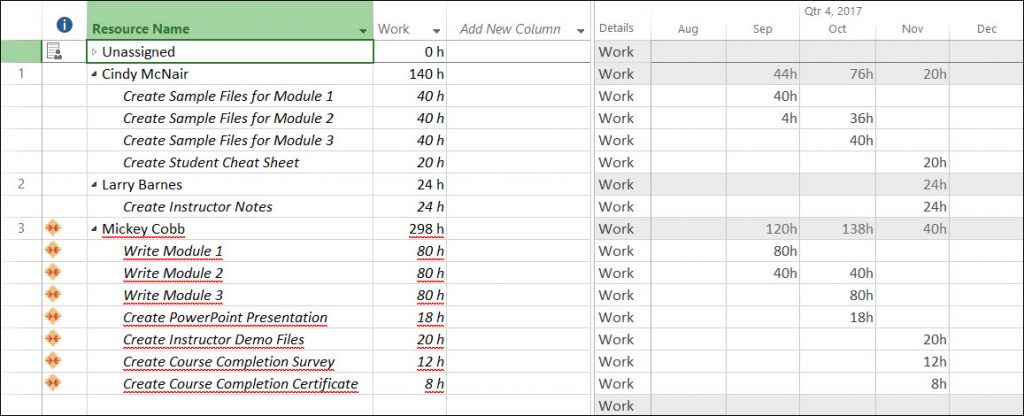
Figure 5: Resource Usage view
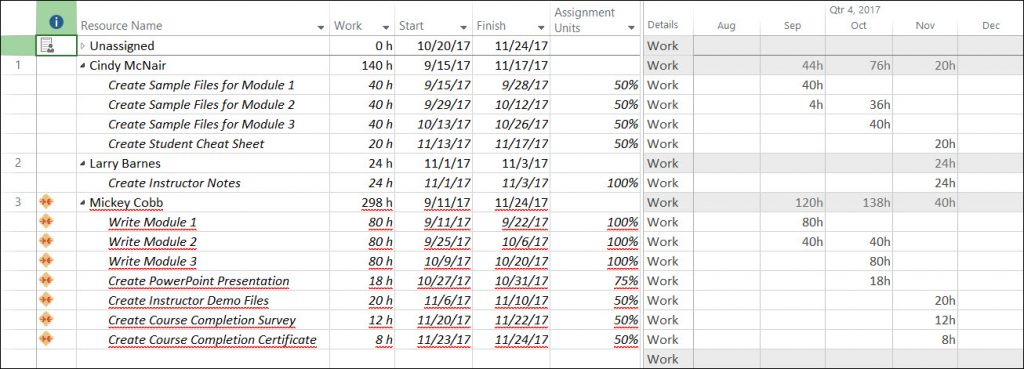
Figure 6: Customized Resource Usage view
Microsoft Project will tile the two windows, stacking them vertically in a layout that looks very much like a combination or “split” view. Figure 7 shows this custom screen layout with the Resource Plan view in the top window and the Resource Usage view in the bottom window.
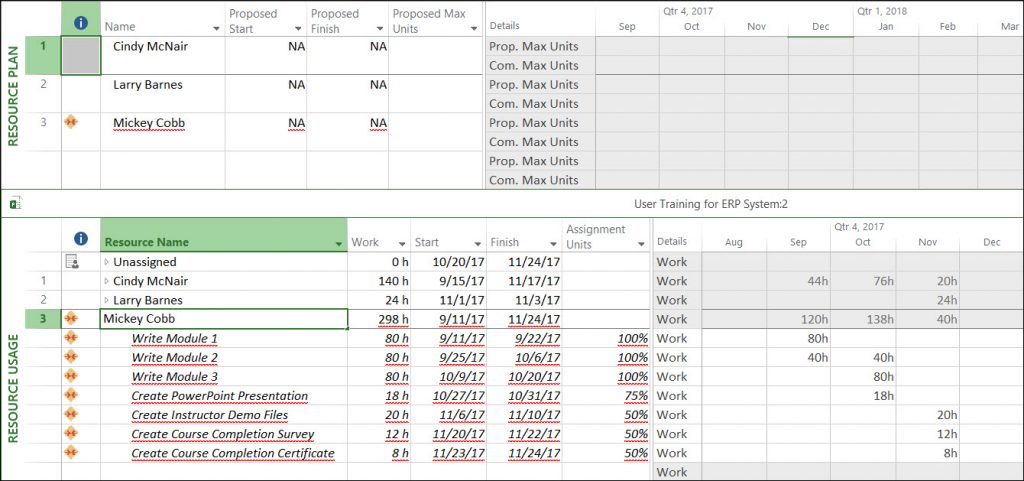
Figure 7: Custom screen layout
Click anywhere in the Resource Plan window to activate the window, and then click the Engagements tab to display the Engagements ribbon. In the Engagements section of the Engagements ribbon, click the New Engagement button to display the Engagement Information dialog. Using the Start, Finish, and Assignment Units information shown in the Resource Usage window for Mickey Cobb, I can create each Resource Engagement for her. For example, Figure 8 shows the new Resource Engagement I created for her to write the training modules.

Figure 8: Engagement Information dialog
Figure 9 shows the custom screen layout after creating three Resource Engagements for Mickey Cobb. Notice how the dates in the Proposed Start and Proposed Finish fields match the dates in the Start and Finish columns in the Resource Usage view. Notice also how the Proposed Max Units value for each Resource Engagement corresponds with the Assignment Units value for Mickey Cobb’s task assignments in the Resource Usage view.

Figure 9: Three Resource Engagements created
To effectively use this custom screen layout, you can activate either window by clicking anywhere in the window. When you activate a window, Microsoft Project displays the appropriate ribbons for the active window. When you finish creating your Resource Engagements, click anywhere in the Resource Usage window to activate it, and then click the Close button in the upper right corner of the window. From there you can save and publish your enterprise project, as well as submit the new Resource Engagements for approval.
")
