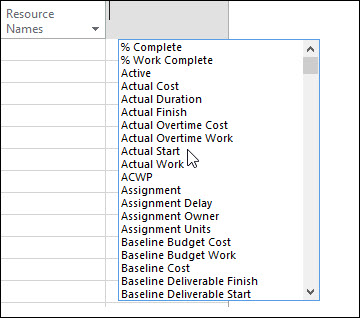
Microsoft introduced a new feature in Microsoft Project 2010 known as the Add New Column virtual column, and continued this feature in the 2013 version of the software. You can find the Add New Column virtual column on the far right end of any default task or resource table, such as the task Entry table shown in Figure 1.
 Figure 1: Add New Column virtual column
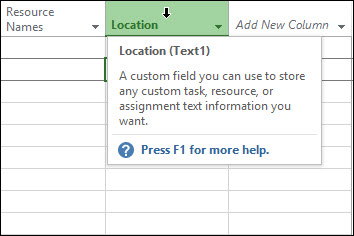
The Add New Column virtual column includes additional functionality of which you may not be aware. For example, you can click the pick list arrow button in this virtual column, manually type of the name of any field not listed in the pick list, and then press the Enter key on your computer keyboard. When you perform this action, Microsoft Project inserts the first unused local Text field to the left of the virtual column and renames the Text field using the name you manually typed. For example, I manually entered the name Location in the Add New Column virtual column, so the software automatically inserted the Text1 column and renamed it as Location. You can see this in Figure 3 when I float my mouse pointer over the column header in the new Location column.

When you manually type the name of a new column in the column header of the Add New Column virtual column, Microsoft Project always inserts the first available Text field and renames it using the name you entered. This means that if you have previously used the Text1, Text2, and Text3 columns as custom columns, Microsoft Project would automatically insert the Text4 column the next time you use this functionality.
Beyond these two features, there is even more functionality available to you using the Add New Column virtual column. If you manually type a value in the virtual column for any task, Microsoft Project 2010 and 2013 automatically insert the next available custom field using the data type you entered. This functionality works as follows:
In Figure 4, you can see this functionality for each of the custom columns I added by typing a value in the Add New Column virtual column for the first task in the project. Notice that when I typed the name, Mickey Cobb, the software inserted the Text2 field and not the Text1 field. This is because I had already used the Text1 field when I typed the word, Location, in the Add New Column virtual column header.

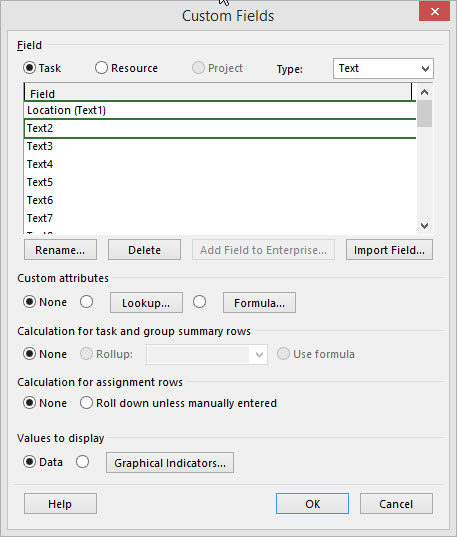
If you use this technique to insert new columns in a table, I recommend that you rename each of the custom fields to apply a descriptive name to the column. To rename a custom field, right-click on the column header of any custom column and select the Custom Fields item on the shortcut menu. Microsoft Project displays the Custom Fields dialog shown in Figure 5.

In the Custom Fields dialog, the software preselects the custom field automatically. Click the Rename button, enter a descriptive name for the custom field, and then click the OK button. Click the OK button to close the Custom Fields dialog as well.

Sensei Project solutions is a recognized global leader in Microsoft project and portfolio management (PPM) solutions focused on improving the way your team works. Sensei’s unique turn-key PPM Platform in the Microsoft Cloud, Sensei IQ™, is designed around your needs and a modern way of working. Sensei IQ™ helps you make informed decisions by understanding how all work fits together with meaningful insights into projects, resources and programs across your portfolios.